How do I install saltunnel?
To install from source:
  $  sudo apt install libsodium-dev libsodium23 # Debian/Ubuntu

  $  sudo dnf install libsodium-devel libsodium-static # RedHat/Fedora

  $  git clone https://github.com/notfed/saltunnel.git

  $  cd saltunnel

  $  sh autogen.sh

  $  ./configure

  $  make

  $  sudo make install
How do I use it?
First, you'll need to generate a long-term key. This key must be 32 uniform random bytes, and you must copy it to both the client and server machines. You may generate the key any way you like, and place it anywhere you like. But in this example, we'll place our key at ~/.saltunnel/k, and we'll generate it and transfer it (which involves manually re-typing the key) using the following commands:
# ---- First machine ----

$ mkdir ~/.saltunnel/k

$ saltunnel key generate ~/.saltunnel/k

$ saltunnel key export ~/.saltunnel/k

7FEA-A77C-5805-6730-5085-90B6-0FB7-E9EC-D869-85F1-6296-EFB9-30A4-23AC-8EDC-81E4
# ---- Second machine ----

$ mkdir ~/.saltunnel/k

$ saltunnel key import ~/.saltunnel/k

7FEA-A77C-5805-6730-5085-90B6-0FB7-E9EC-D869-85F1-6296-EFB9-30A4-23AC-8EDC-81E4
Next, you can establish a tunnel. Continuing the "Clyde and Steve" example from the Introduction page, we want to end up with the following:
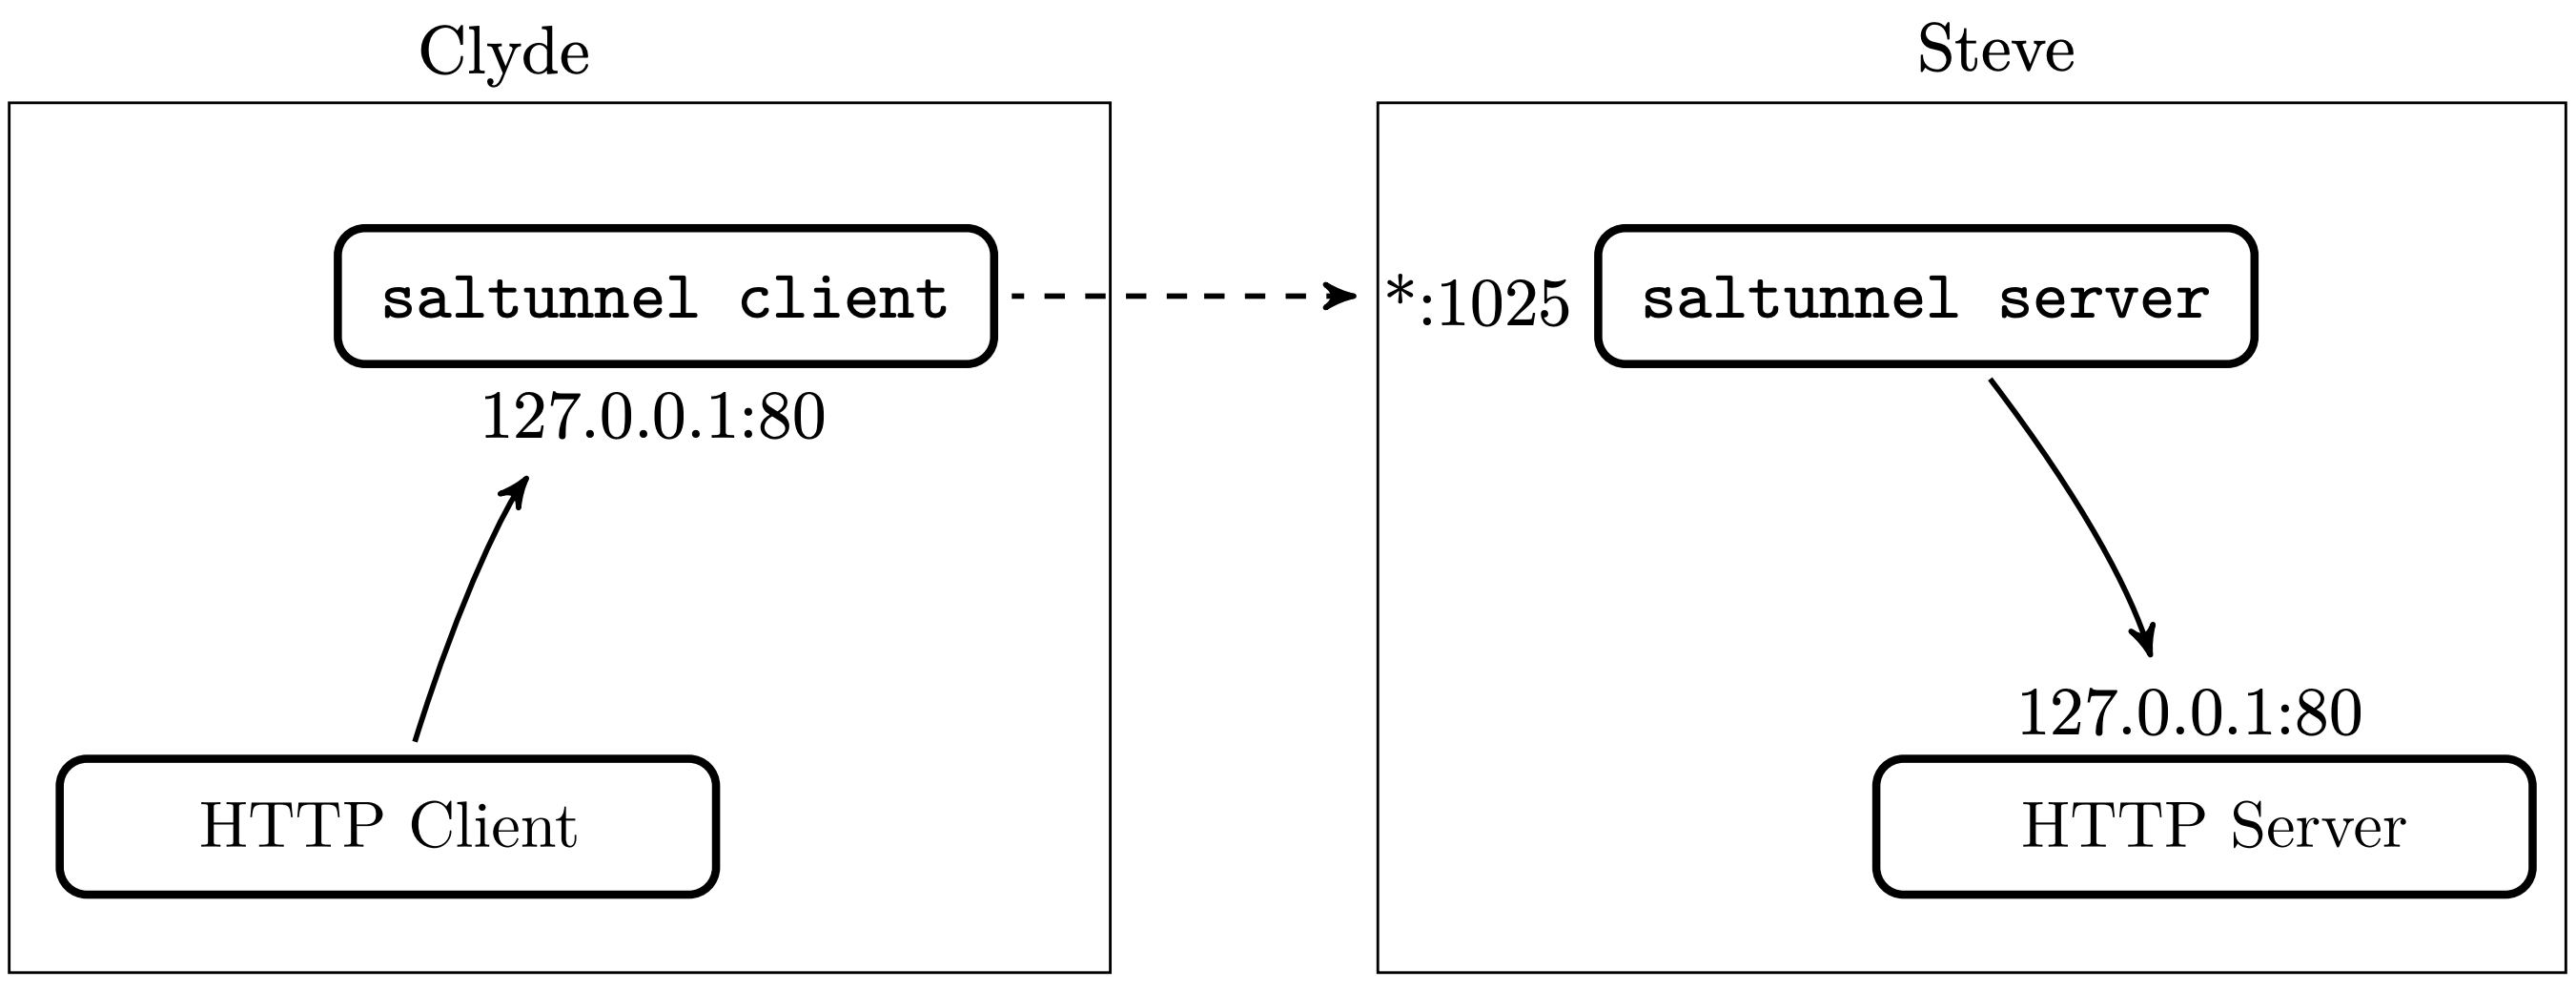
To get there, Clyde will need to run:
saltunnel client -k ~/.saltunnel/k 127.0.0.1:80 steves-ip-or-hostname.example.com:1025
...and Steve will need to run:
saltunnel server -k ~/.saltunnel/k 0.0.0.0:1025 127.0.0.1:80
Finally, Steve will need to configure his network to forward port 1025 to his computer.
That's it. Now, when Clyde establishes a TCP connection on his local port 80, all of the data within that connection will be securely authenticated, encrypted, and forwarded as a new connection to Steve's port 1025, which will in turn be verified, decrypted, and forwarded to Steve's local port 80.